
第十一步:添加Character的组件
第十一步:添加Character的组件
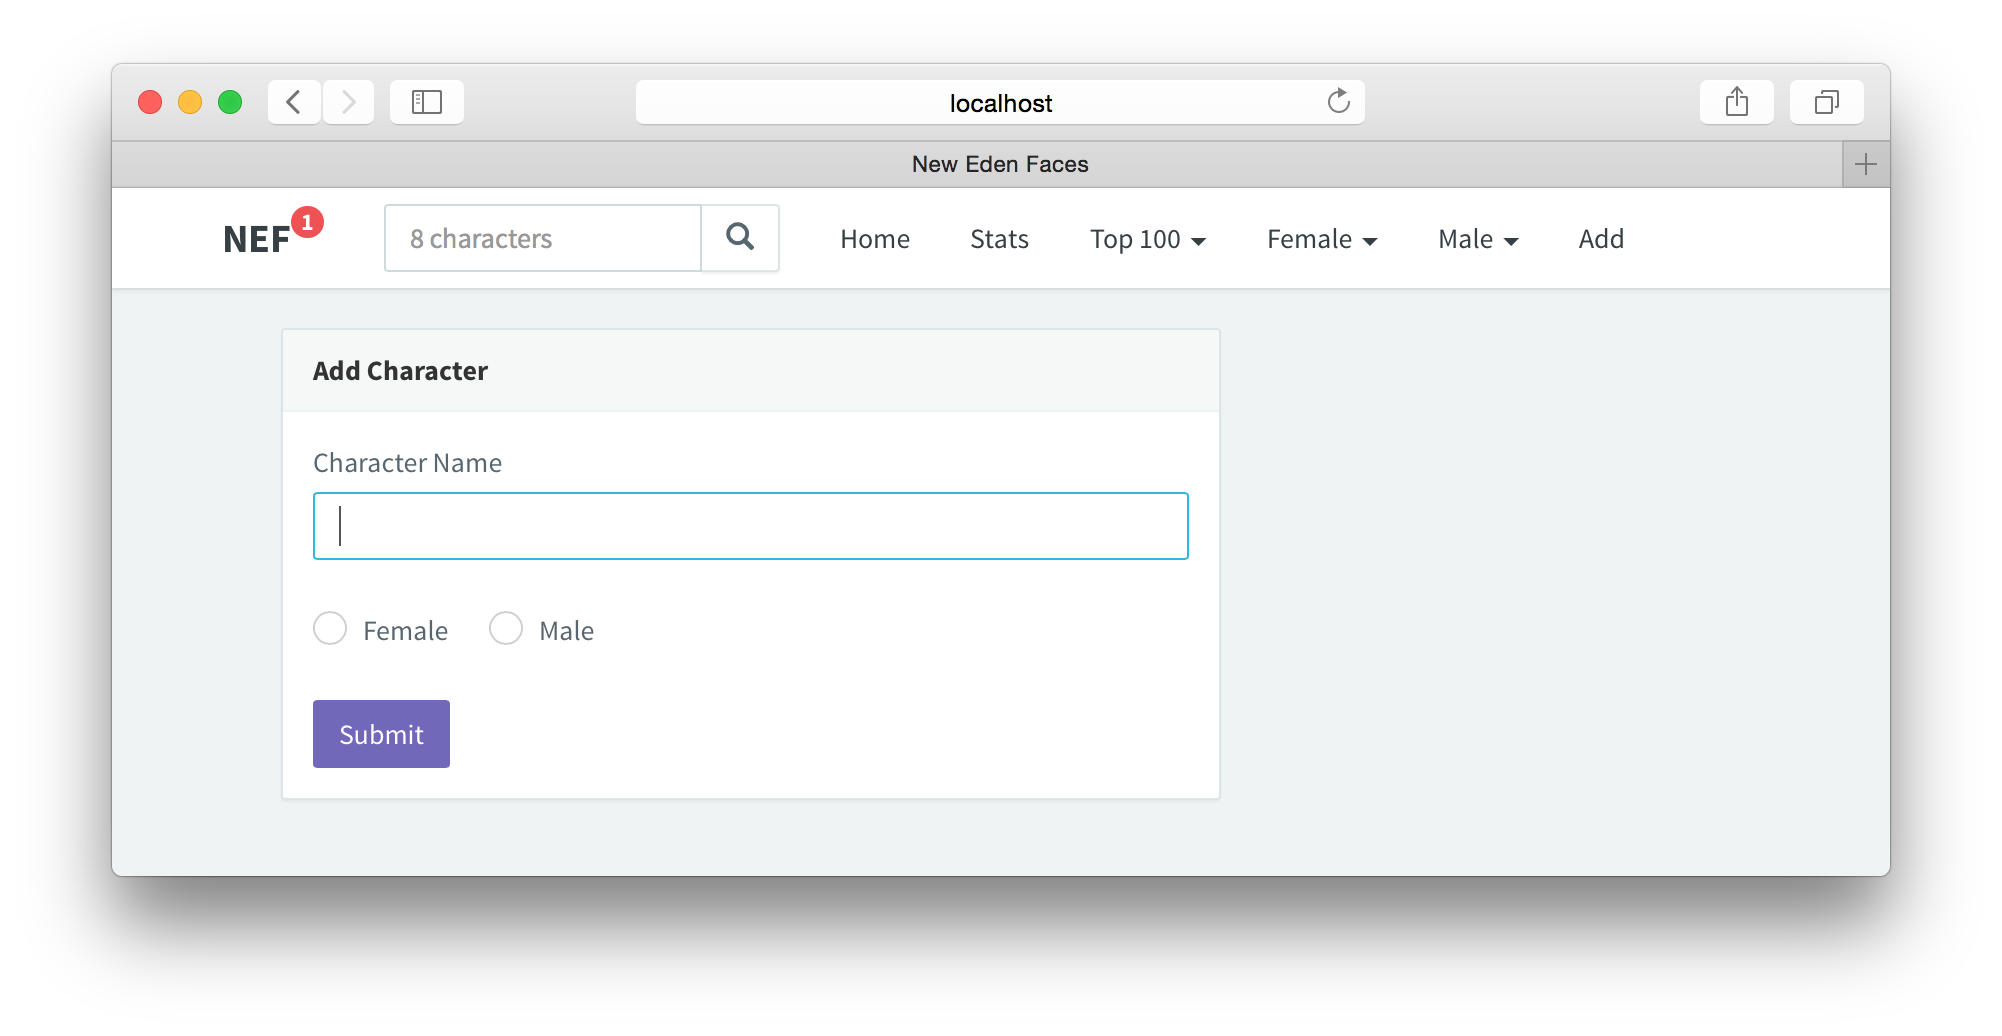
这个组件包含一个简单的表单。成功或失败的消息会显示在输入框下的help-block里。
组件
在app/components目录新建文件AddCharacter.js:
import React from 'react';
import AddCharacterStore from '../stores/AddCharacterStore';
import AddCharacterActions from '../actions/AddCharacterActions';

class AddCharacter extends React.Component {
  constructor(props) {
    super(props);
    this.state = AddCharacterStore.getState();
    this.onChange = this.onChange.bind(this);
  }

  componentDidMount() {
    AddCharacterStore.listen(this.onChange);
  }

  componentWillUnmount() {
    AddCharacterStore.unlisten(this.onChange);
  }

  onChange(state) {
    this.setState(state);
  }

  handleSubmit(event) {
    event.preventDefault();

    var name = this.state.name.trim();
    var gender = this.state.gender;

    if (!name) {
      AddCharacterActions.invalidName();
      this.refs.nameTextField.getDOMNode().focus();
    }

    if (!gender) {
      AddCharacterActions.invalidGender();
    }

    if (name && gender) {
      AddCharacterActions.addCharacter(name, gender);
    }
  }

  render() {
    return (
      <div className='container'>
        <div className='row flipInX animated'>
          <div className='col-sm-8'>
            <div className='panel panel-default'>
              <div className='panel-heading'>Add Character</div>
              <div className='panel-body'>
                <form onSubmit={this.handleSubmit.bind(this)}>
                  <div className={'form-group ' + this.state.nameValidationState}>
                    <label className='control-label'>Character Name</label>
                    <input type='text' className='form-control' ref='nameTextField' value={this.state.name}
                           onChange={AddCharacterActions.updateName} autoFocus/>
                    <span className='help-block'>{this.state.helpBlock}</span>
                  </div>
                  <div className={'form-group ' + this.state.genderValidationState}>
                    <div className='radio radio-inline'>
                      <input type='radio' name='gender' id='female' value='Female' checked={this.state.gender === 'Female'}
                             onChange={AddCharacterActions.updateGender}/>
                      <label htmlFor='female'>Female</label>
                    </div>
                    <div className='radio radio-inline'>
                      <input type='radio' name='gender' id='male' value='Male' checked={this.state.gender === 'Male'}
                             onChange={AddCharacterActions.updateGender}/>
                      <label htmlFor='male'>Male</label>
                    </div>
                  </div>
                  <button type='submit' className='btn btn-primary'>Submit</button>
                </form>
              </div>
            </div>
          </div>
        </div>
      </div>
    );
  }
}

export default AddCharacter;
现在你可以看到这些组件的一些共同点:
- 设置组件的初始状态为store中的值。
- 在
componentDidMount中添加store监听者,在componentWillUnmount中移除。 - 添加
onChange方法,无论何时当store改变后更新组件状态。
handleSubmit方法的作用和你想的一样——处理添加新角色的表单提交。当它为真时我们能在addCharacter action里完成表单验证,不过这样做的话,需要我们将输入区的DOM节点传到action,因为当nameTextField无效时,需要focus在输入框,这样用户可以直接输入而无需点击一下输入框。
Actions
在app/actions目录新建AddCharacterActions.js:
import alt from '../alt';

class AddCharacterActions {
  constructor() {
    this.generateActions(
      'addCharacterSuccess',
      'addCharacterFail',
      'updateName',
      'updateGender',
      'invalidName',
      'invalidGender'
    );
  }

  addCharacter(name, gender) {
    $.ajax({
      type: 'POST',
      url: '/api/characters',
      data: { name: name, gender: gender }
    })
      .done((data) => {
        this.actions.addCharacterSuccess(data.message);
      })
      .fail((jqXhr) => {
        this.actions.addCharacterFail(jqXhr.responseJSON.message);
      });
  }
}

export default alt.createActions(AddCharacterActions);当角色被成功加入数据库后触发addCharacterSuccess,当失败时触发addCharacterFail,失败的原因可能是无效的名字,或角色已经在数据库中存在了。当角色的Name字段和Gender单选框改变时由onChange触发updateName和updateGender,同样的,当输入的名字无效或没有选择性别时触发invalidName和invalidGender。
Store
在app/stores目录新建AddCharacterStore.js:
import alt from '../alt';
import AddCharacterActions from '../actions/AddCharacterActions';

class AddCharacterStore {
  constructor() {
    this.bindActions(AddCharacterActions);
    this.name = '';
    this.gender = '';
    this.helpBlock = '';
    this.nameValidationState = '';
    this.genderValidationState = '';
  }

  onAddCharacterSuccess(successMessage) {
    this.nameValidationState = 'has-success';
    this.helpBlock = successMessage;
  }

  onAddCharacterFail(errorMessage) {
    this.nameValidationState = 'has-error';
    this.helpBlock = errorMessage;
  }

  onUpdateName(event) {
    this.name = event.target.value;
    this.nameValidationState = '';
    this.helpBlock = '';
  }

  onUpdateGender(event) {
    this.gender = event.target.value;
    this.genderValidationState = '';
  }

  onInvalidName() {
    this.nameValidationState = 'has-error';
    this.helpBlock = 'Please enter a character name.';
  }

  onInvalidGender() {
    this.genderValidationState = 'has-error';
  }
}

export default alt.createStore(AddCharacterStore);nameValidationState和genderValidationState指向Bootstrap提供的代表验证状态的表单控件。
helpBlock是在输入框下显示的状态信息,如“Character has been added successfully”。
onInvalidName方法当Character Name字段为空时触发。如果name在EVE中不存在,将由onAddCharacterFail输出另一个错误信息。
最后,打开routes.js并添加新的路由/add,以及AddCharacter组件方法:
import React from 'react';
import {Route} from 'react-router';
import App from './components/App';
import Home from './components/Home';
import AddCharacter from './components/AddCharacter';

export default (
  <Route handler={App}>
    <Route path='/' handler={Home} />
    <Route path='/add' handler={AddCharacter} />
  </Route>
);
这里简单总结了从你输入角色名称开始的整个流程:
- 触发
updateNameaction,传递event对象。 - 调用
onUpdateNamestore处理程序。 - 使用新的名称更新状态。

在下一节,我们将实现添加和保存新character到数据库的后端代码。