
Spring教程 - 弹簧依赖检查
Spring教程 - 弹簧依赖检查
Spring可以做依赖检查以确保已设置或注入所需的属性。
Spring可以做依赖检查以确保已设置或注入所需的属性。...
- none - No dependency checking. Default mode.
- simple - If any properties of primitive type (int, long, double...) and collection types (map, list...) have not been set, Spring throws UnsatisfiedDependencyException.
- objects - If any properties of object type have not been set, Spring will throw UnsatisfiedDependencyException.
- all - If any properties of any type have not been set, Spring will throw an UnsatisfiedDependencyException.
Java Bean
以下部分使用两个Java bean如下所示以显示如何使用依赖性检查。
客户类。
package com.www.w3cschool.cnmon;

public class Customer {
  private Person person;
  private int type;
  private String action;

  public Person getPerson() {
    return person;
  }

  public void setPerson(Person person) {
    this.person = person;
  }

  public int getType() {
    return type;
  }

  public void setType(int type) {
    this.type = type;
  }

  public String getAction() {
    return action;
  }

  public void setAction(String action) {
    this.action = action;
  }

  @Override
  public String toString() {
    return "Customer [person=" + person + ", type=" + type + ", action="
        + action + "]";
  }
}
人员类
package com.www.w3cschool.cnmon;

public class Person
{
    private String name;
    private String address;
    private int age;
    public String getName() {
      return name;
    }
    public void setName(String name) {
      this.name = name;
    }
    public String getAddress() {
      return address;
    }
    public void setAddress(String address) {
      this.address = address;
    }
    public int getAge() {
      return age;
    }
    public void setAge(int age) {
      this.age = age;
    }
  @Override
  public String toString() {
    return "Person [name=" + name + ", address=" + address + ", age=" + age
        + "]";
  }

}
依赖性检查:无
下面的代码显示了如何使用spring bean配置文件与“无"依赖性检查模式。
<beans xmlns="http://www.springframework.org/schema/beans"
  xmlns:xsi="http://www.w3.org/2001/XMLSchema-instance"
  xsi:schemaLocation="http://www.springframework.org/schema/beans
  http://www.springframework.org/schema/beans/spring-beans-2.5.xsd">
  <bean id="myCustomer" class="com.www.w3cschool.cnmon.Customer" >
    <property name="action" value="buy" />
  </bean>
  <bean id="myPerson" class="com.www.w3cschool.cnmon.Person">
    <property name="name" value="java2s" />
    <property name="address" value="address ABC" />
    <property name="age" value="29" />
  </bean>
</beans>
依赖关系检查的默认值为none。如果没有明确定义依赖性检查模式,它的默认值为“none",因此不会执行依赖性检查。
依赖性检查:无...
依赖关系检查的默认值为none。如果没有明确定义依赖性检查模式,它的默认值为“none",因此不会执行依赖性检查。...
  <bean id="myCustomer" class="com.www.w3cschool.cnmon.Customer"
         dependency-check="simple">
完整配置文件。
<beans xmlns="http://www.springframework.org/schema/beans"
  xmlns:xsi="http://www.w3.org/2001/XMLSchema-instance"
  xsi:schemaLocation="http://www.springframework.org/schema/beans
  http://www.springframework.org/schema/beans/spring-beans-2.5.xsd">
  <bean id="myCustomer" class="com.www.w3cschool.cnmon.Customer"
         dependency-check="simple">
    <property name="person" ref="myPerson" />
    <property name="action" value="buy" />
  </bean>
  <bean id="myPerson" class="com.www.w3cschool.cnmon.Person">
    <property name="name" value="java2s" />
    <property name="address" value="address ABC" />
    <property name="age" value="29" />
  </bean>
</beans>
完整配置文件。...
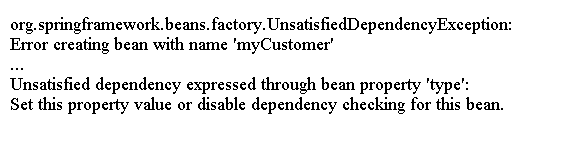
“type"属性是类型int,它是一个基本类型尚未设置,一个UnsatisfiedDependencyException将抛出如下。
使用@Required注释进行Spring依赖性检查
在下面我们将介绍另一种进行依赖性检查的方法。
我们可以使用@Required Annotation为Java bean添加依赖性检查。
@Required注释可应用于特定属性。
以下Customer对象在setPerson()方法中具有@Required以确保person属性已设置。
package com.www.w3cschool.cnmon;
import org.springframework.beans.factory.annotation.Required;
public class Customer
{
  private Person person;
  private int type;
  private String action;
  public Person getPerson() {
    return person;
  }
  @Required
  public void setPerson(Person person) {
    this.person = person;
  }
  public int getType() {
    return type;
  }
  public void setType(int type) {
    this.type = type;
  }
  public String getAction() {
    return action;
  }
  public void setAction(String action) {
    this.action = action;
  }

}
在对方法应用@Required注释之后,我们还需要注册一个RequiredAnnotationBeanPostProcessor以确认bean配置文件中的@Required注释。
有两种方法可以启用RequiredAnnotationBeanPostProcessor。
- Add Spring context and <context:annotation-config /> in bean configuration file.
- Include "RequiredAnnotationBeanPostProcessor" directly in bean configuration file.
这里是上下文的语法:annotation-config。
<context:annotation-config />
完整的源代码,
<beans xmlns="http://www.springframework.org/schema/beans"
  xmlns:xsi="http://www.w3.org/2001/XMLSchema-instance"
  xmlns:context="http://www.springframework.org/schema/context"
  xsi:schemaLocation="http://www.springframework.org/schema/beans
  http://www.springframework.org/schema/beans/spring-beans-2.5.xsd
  http://www.springframework.org/schema/context
  http://www.springframework.org/schema/context/spring-context-2.5.xsd">

  <context:annotation-config />

  <bean id="CustomerBean" class="com.www.w3cschool.cnmon.Customer">
    <property name="action" value="buy" />
    <property name="type" value="1" />
  </bean>
  <bean id="PersonBean" class="com.www.w3cschool.cnmon.Person">
    <property name="name" value="java2s" />
    <property name="address" value="address ABC" />
    <property name="age" value="29" />
  </bean>
</beans>
以下xml代码显示如何包含“RequiredAnnotationBeanPostProcessor"在bean配置文件中。
<beans xmlns="http://www.springframework.org/schema/beans"
  xmlns:xsi="http://www.w3.org/2001/XMLSchema-instance"
  xsi:schemaLocation="http://www.springframework.org/schema/beans
  http://www.springframework.org/schema/beans/spring-beans-2.5.xsd">
    <bean
        class="org.springframework.beans.factory.annotation.RequiredAnnotationBeanPostProcessor"/>
  <bean id="CustomerBean" class="com.www.w3cschool.cnmon.Customer">
    <property name="action" value="buy" />
    <property name="type" value="1" />
  </bean>
  <bean id="PersonBean" class="com.www.w3cschool.cnmon.Person">
    <property name="name" value="java2s" />
    <property name="address" value="address ABC" />
    <property name="age" value="29" />
  </bean>
</beans>
如果我们运行它,将抛出以下错误消息,因为未设置person属性。
org.springframework.beans.factory.BeanInitializationException:
  Property "person" is required for bean "CustomerBean"
使用@Required注释进行Spring依赖性检查...
我们可以定义自定义注释,通过使用Spring进行依赖性检查@必需样式注释。
在下面的示例中,我们将创建一个名为@Mandatory的自定义@必需类型的注释,这相当于@Required注释。
在下面的示例中,我们将创建一个名为@Mandatory的自定义@必需类型的注释,这相当于@Required注释。...
package com.www.w3cschool.cnmon;
import java.lang.annotation.ElementType;
import java.lang.annotation.Retention;
import java.lang.annotation.RetentionPolicy;
import java.lang.annotation.Target;
@Retention(RetentionPolicy.RUNTIME)
@Target(ElementType.METHOD)
public @interface Mandatory {
}
然后,我们将新创建的注释应用于来自Java Bean的属性。
package com.www.w3cschool.cnmon;

public class Customer
{
  private Person person;
  private int type;
  private String action;

  @Mandatory
  public void setPerson(Person person) {
    this.person = person;
  }
}
最后,我们需要在xml配置文件中注册它包括@Mandatory注释在“RequiredAnnotationBeanPostProcessor"类中。
<beans xmlns="http://www.springframework.org/schema/beans"
  xmlns:xsi="http://www.w3.org/2001/XMLSchema-instance"
  xsi:schemaLocation="http://www.springframework.org/schema/beans
  http://www.springframework.org/schema/beans/spring-beans-2.5.xsd">
    <bean class="org.springframework.beans.factory.annotation.RequiredAnnotationBeanPostProcessor">
      <property name="requiredAnnotationType" value="com.www.w3cschool.cnmon.Mandatory"/>
    </bean>
  <bean id="CustomerBean" class="com.www.w3cschool.cnmon.Customer">
    <property name="action" value="buy" />
    <property name="type" value="1" />
  </bean>
</beans>