响应式 Web 设计 – 网格视图
响应式 Web 设计 - 网格视图
什么是网格视图?
很多网页都是基于网格设计的,这说明网页是按列来布局的。

使用网格视图有助于我们设计网页。这让我们向网页添加元素变的更简单。

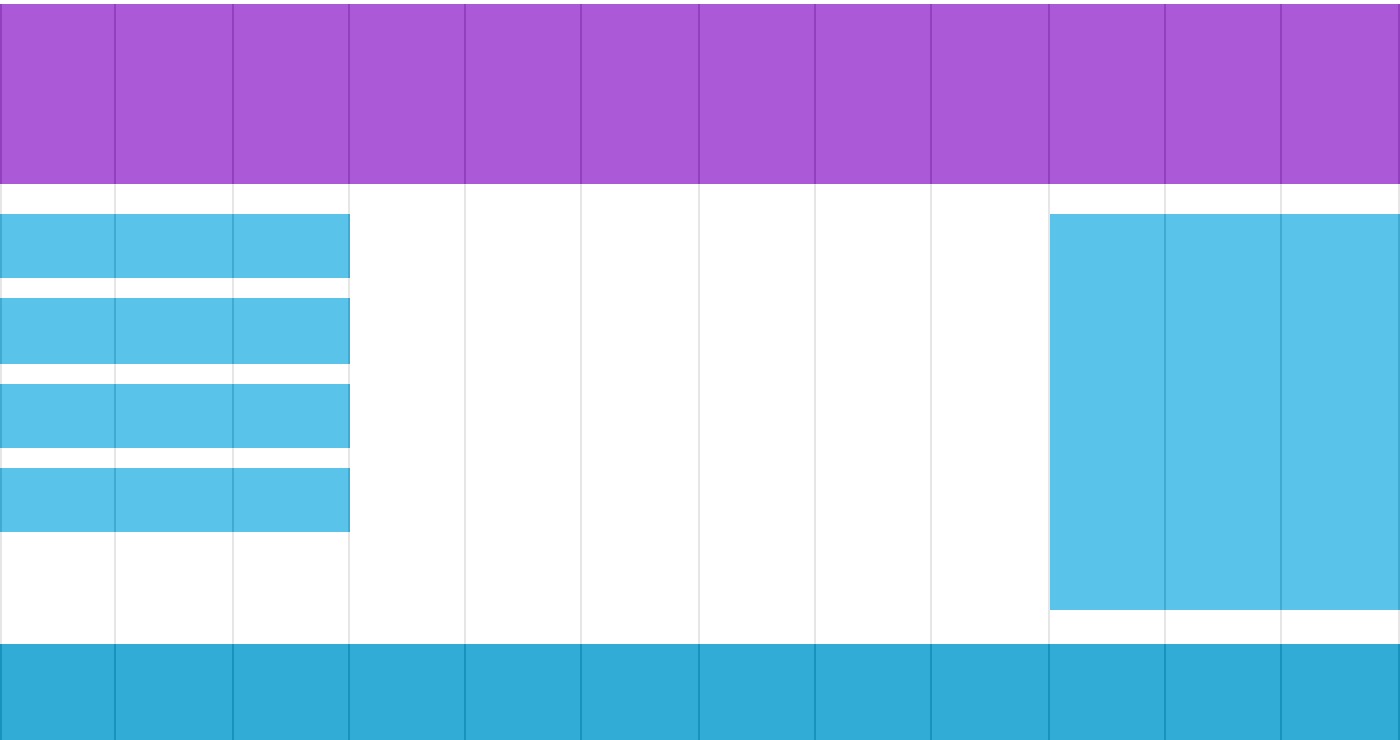
响应式网格视图通常是 12 列,宽度为100%,在浏览器窗口大小调整时会自动伸缩。
创建响应式网格视图
接下来我们来创建一个响应式网格视图。
首先确保所有的 HTML 元素都有 box-sizing 属性且设置为 border-box。
确保边距和边框包含在元素的宽度和高度间。
添加如下代码:
* {
    box-sizing: border-box;
}
* {
box-sizing: border-box;
}
查看更多 box-sizing 内容请点击:CSS3 box-sizing 属性 。
以下实例演示了简单的响应式网页,包含两列:
以上实例包含两列。
12 列的网格系统可以更好的控制响应式网页。
首先我们可以计算每列的百分比: 100% / 12 列 = 8.33%。
在每列中指定 class, class="col-" 用于定义每列有几个 span :
CSS:
.col-1 {width: 8.33%;}
.col-2 {width: 16.66%;}
.col-3 {width: 25%;}
.col-4 {width: 33.33%;}
.col-5 {width: 41.66%;}
.col-6 {width: 50%;}
.col-7 {width: 58.33%;}
.col-8 {width: 66.66%;}
.col-9 {width: 75%;}
.col-10 {width: 83.33%;}
.col-11 {width: 91.66%;}
.col-12 {width: 100%;}
.col-2 {width: 16.66%;}
.col-3 {width: 25%;}
.col-4 {width: 33.33%;}
.col-5 {width: 41.66%;}
.col-6 {width: 50%;}
.col-7 {width: 58.33%;}
.col-8 {width: 66.66%;}
.col-9 {width: 75%;}
.col-10 {width: 83.33%;}
.col-11 {width: 91.66%;}
.col-12 {width: 100%;}
尝试一下 »
所有的列向左浮动,间距(padding) 为 15px:
CSS:
[class*="col-"] {
float: left;
padding: 15px;
border: 1px solid red;}
float: left;
padding: 15px;
border: 1px solid red;}
每一行使用 <div> 包裹。所有列数加起来应为 12:
<div class="row">
<div class="col-3">...</div>
<div class="col-9">...</div>
</div>
<div class="col-3">...</div>
<div class="col-9">...</div>
</div>
列中行为左浮动,并添加清除浮动:
CSS:
.row:after {
content: "";
clear: both;
display: block;}
content: "";
clear: both;
display: block;}
我们可以添加一些样式和颜色,让其更好看:
实例
.header {
background-color: #9933cc;
color: #ffffff;
padding: 15px;}
.menu li {
padding: 8px;
margin-bottom: 7px;
background-color :#33b5e5;
color: #ffffff;
box-shadow: 0 1px 3px rgba(0,0,0,0.12), 0 1px 2px rgba(0,0,0,0.24);}
.menu li:hover {
background-color: #0099cc;}
background-color: #9933cc;
color: #ffffff;
padding: 15px;}
.menu li {
padding: 8px;
margin-bottom: 7px;
background-color :#33b5e5;
color: #ffffff;
box-shadow: 0 1px 3px rgba(0,0,0,0.12), 0 1px 2px rgba(0,0,0,0.24);}
.menu li:hover {
background-color: #0099cc;}
尝试一下 »