ECharts图形元素组件(graphic)
ECharts 图表中原生图形元素组件 graphic 可以支持包括:image,circle,ring,polygon,rect,bezierCurve,arc 等等的图形元素。这些图形元素如何设置、层级关系如何、相对定位怎么实现,我们在本节内容中会做出介绍。
下面,我们先通过简单的两个例子,看看 ECharts 图形元素组件是如何使用的。
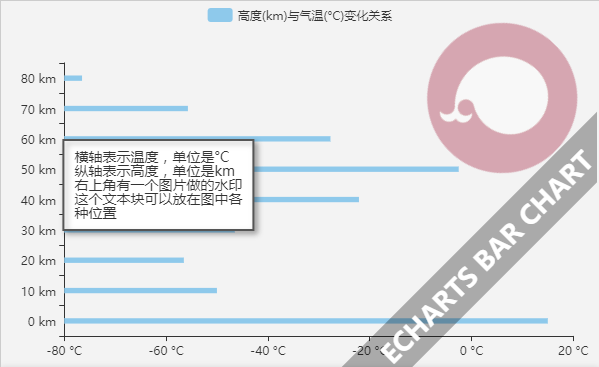
下面示例中,使用图形元素做了水印,和文本块:

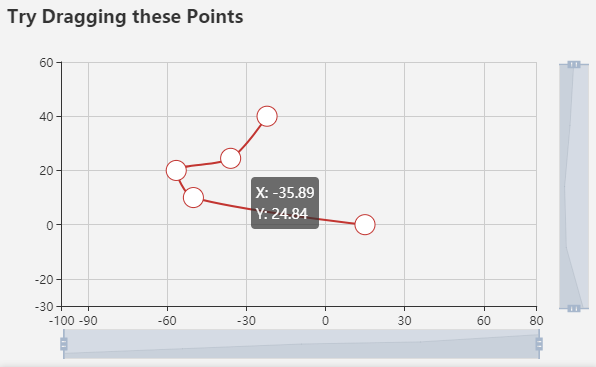
下面示例中,使用隐藏的图形元素实现了拖拽:

ECharts 图形元素组件设置介绍
以下是只搭配一个图形元素时的简写方法:
myChart.setOption({
    ...,
    graphic: {
        type: 'image',
        ...
    }
});
如果要配置多个图形元素,则写法如下:
myChart.setOption({
    ...,
    graphic: [
        { // 一个图形元素,类型是 image。
            type: 'image',
            ...
        },
        { // 一个图形元素,类型是 text,指定了 id。
            type: 'text',
            id: 'text1',
            ...
        },
        { // 一个图形元素,类型是 group,可以嵌套子节点。
            type: 'group',
            children: [
                {
                    type: 'rect',
                    id: 'rect1',
                    ...
                },
                {
                    type: 'image',
                    ...
                },
                ...
            ]
        }
        ...
    ]
});
使用 setOption 来删除或更换(替代)已有的图形元素:
myChart.setOption({
    ...,
    graphic: [
        { // 删除上例中定义的 'text1' 元素。
            id: 'text1',
            $action: 'remove',
            ...
        },
        { // 将上例中定义的 'rect1' 元素换成 circle。
          // 注意尽管 'rect1' 在一个 group 中,但这里并不需要顾忌层级,用id指定就可以了。
            id: 'rect1',
            $action: 'replace',
            type: 'circle',
            ...
        }
    ]
});
注意,如果没有指定 id,第二次 setOption 时会按照元素在 option 中出现的顺序和已有的图形元素进行匹配。这有时会产生不易理解的效果。 所以,一般来说,更新 elements 时推荐使用 id 进行准确的指定,而非省略 id。图形元素设置介绍
介绍每个图形元素的配置。不同类型的图形元素的设置有以下这些共性:
{
    // id 用于在更新图形元素时指定更新哪个图形元素,如果不需要用可以忽略。
    id: 'xxx',

    // 这个字段在第一次设置时不能忽略,取值见上方『支持的图形元素』。
    type: 'image',

    // 下面的各个属性如果不需要设置都可以忽略,忽略则取默认值。

    // 指定本次 setOption 对此图形元素进行的操作。默认是 'merge',还可以 'replace' 或 'remove'。
    $action: 'replace',

    // 这是四个相对于父元素的定位属性,每个属性可取『像素值』或者『百分比』或者 'center'/'middle'。
    left: 10,
    // right: 10,
    top: 'center',
    // bottom: '10%',

    shape: {
        // 定位、形状相关的设置,如 x, y, cx, cy, width, height, r, points 等。
        // 注意,如果设置了 left/right/top/bottom,这里的定位用的 x/y/cx/cy 会失效。
    },

    style: {
        // 样式相关的设置,如 fill, stroke, lineWidth, shadowBlur 等。
    },

    // 表示 z 高度,从而指定了图形元素的覆盖关系。
    z: 10,
    // 表示不响应事件。
    silent: true,
    // 表示节点不显示
    invisible: false,
    // 设置是否整体限制在父节点范围内。可选值:'raw', 'all'。
    bouding: 'raw',
    // 是否可以被拖拽。
    draggable: false,
    // 事件的监听器,还可以是 onmousemove, ondrag 等。支持的事件参见下。
    onclick: function () {...}
}
图形元素的事件
ECharts 图形元素支持这些事件配置: onclick, onmouseover, onmouseout, onmousemove, onmousewheel, onmousedown, onmouseup, ondrag, ondragstart, ondragend, ondragenter, ondragleave, ondragover, ondrop。
图形元素的层级关系
只有 group 元素可以有子节点,从而以该 group 元素为根的元素树可以共同定位(共同移动)。
图形元素的基本形状设置
每个图形元素本身有自己的图形基本的位置和尺寸设置,例如:
{
    type: 'rect',
    shape: {
        x: 10,
        y: 10,
        width: 100,
        height: 200
    }
},
{
    type: 'circle',
    shape: {
        cx: 20,
        cy: 30,
        r: 100
    }
},
{
    type: 'image',
    style: {
        image: 'http://xxx.xxx.xxx/a.png',
        x: 100,
        y: 200,
        width: 230,
        height: 400
    }
},
{
    type: 'text',
    style: {
        text: 'This text',
        x: 100,
        y: 200
    }

}
图形元素的定位和 transfrom
除此以外,可以以 transform 的方式对图形进行平移、旋转、缩放,
{
    type: 'rect',
    position: [100, 200], // 平移,默认值为 [0, 0]。
    scale: [2, 4], // 缩放,默认值为 [1, 1]。表示缩放的倍数。
    rotation: Math.PI / 4, // 旋转,默认值为 0。表示旋转的弧度值。正值表示逆时针旋转。
    origin: [10, 20], // 旋转和缩放的中心点,默认值为 [0, 0]。
    shape: {
        // ...
    }
}- 每个图形元素在父节点的坐标系中进行 transform,也就是说父子节点的 transform 能『叠加』。
- 每个图形元素进行 transform 顺序是:平移 [-el.origin[0], -el.origin[1]]。根据 el.scale 缩放。根据 el.rotation 旋转。根据 el.origin 平移。根据 el.position 平移。
- 也就是说先缩放旋转后平移,这样平移不会影响缩放旋转的 origin。
图形元素相对定位
以上两者是基本的绝对定位,除此之外,在实际应用中,容器尺寸常常是不确定甚至动态变化的,所以需要提供相对定位的机制。graphic 组件使用 left / right / top / bottom / width / height 提供了相对定位的机制。
例如:
{ // 将图片定位到最下方的中间:
    type: 'image',
    left: 'center', // 水平定位到中间
    bottom: '10%',  // 定位到距离下边界 10% 处
    style: {
        image: 'http://xxx.xxx.xxx/a.png',
        width: 45,
        height: 45
    }
},
{ // 将旋转过的 group 整体定位右下角:
    type: 'group',
    right: 0,  // 定位到右下角
    bottom: 0, // 定位到右下角
    rotation: Math.PI / 4,
    children: [
        {
            type: 'rect',
            left: 'center', // 相对父元素居中
            top: 'middle',  // 相对父元素居中
            shape: {
                width: 190,
                height: 90
            },
            style: {
                fill: '#fff',
                stroke: '#999',
                lineWidth: 2,
                shadowBlur: 8,
                shadowOffsetX: 3,
                shadowOffsetY: 3,
                shadowColor: 'rgba(0,0,0,0.3)'
            }
        },
        {
            type: 'text',
            left: 'center', // 相对父元素居中
            top: 'middle',  // 相对父元素居中
            style: {
                fill: '#777',
                text: [
                    'This is text',
                    '这是一段文字',
                    'Print some text'
                ].join('\n'),
                font: '14px Microsoft YaHei'
            }
        }
    ]
}
注意,可以用 bounding 来设置是否整体限制在父节点范围内。下面是详细配置。
graphic.elements[i]
里面包含所有图形元素的集合。
注意:graphic 的标准写法是:
{
    graphic: {
        elements: [
            {type: 'rect', ...}, {type: 'circle', ...}, ...
        ]
    }
}
但是我们常常可以用简写:
{
    graphic: {
        type: 'rect',
        ...
    }
}
或者:
{
    graphic: [
        {type: 'rect', ...}, {type: 'circle', ...}, ...
    ]
}