Angular 惰性加载特性模块
惰性加载特性模块
默认情况下,NgModule 都是急性加载的,也就是说它会在应用加载时尽快加载,所有模块都是如此,无论是否立即要用。对于带有很多路由的大型应用,考虑使用惰性加载 —— 一种按需加载 NgModule 的模式。惰性加载可以减小初始包的尺寸,从而减少加载时间。
惰性加载入门
本节会介绍配置惰性加载路由的基本过程。 想要一个分步的范例,参阅本页的分步设置部分。
要惰性加载 Angular 模块,请在 AppRoutingModule routes 中使用 loadChildren 代替 component 进行配置,代码如下。
const routes: Routes = [
  {
    path: 'items',
    loadChildren: () => import('./items/items.module').then(m => m.ItemsModule)
  }
];
在惰性加载模块的路由模块中,添加一个指向该组件的路由。
const routes: Routes = [
  {
    path: '',
    component: ItemsComponent
  }
];
还要确保从 AppModule 中移除了 ItemsModule。想要一个关于惰性加载模块的分步操作指南,请继续查看本页的后续章节。
分步设置
建立惰性加载的特性模块有两个主要步骤:
- 使用
--route 标志,用 CLI 创建特性模块。 - 配置相关路由。
建立应用
如果你还没有应用,可以遵循下面的步骤使用 CLI 创建一个。如果已经有了,可以直接跳到导入与路由配置部分。 输入下列命令,其中的 customer-app 表示你的应用名称:
ng new customer-app --routing这会创建一个名叫 customer-app 的应用,而 --routing 标识生成了一个名叫 app-routing.module.ts 的文件,它是你建立惰性加载的特性模块时所必须的。输入命令 cd customer-app 进入该项目。
--routing 选项需要 Angular/CLI 8.1 或更高版本。
创建一个带路由的特性模块
接下来,你将需要一个包含路由的目标组件的特性模块。要创建它,在终端中输入如下命令,其中 customers 是特性模块的名称。加载 customers 特性模块的路径也是 customers,因为它是通过 --route 选项指定的:
ng generate module customers --route customers --module app.module这将创建一个 customers 文件夹,在其 customers.module.ts 文件中定义了新的可惰性加载模块 CustomersModule。该命令会自动在新特性模块中声明 CustomersComponent。
因为这个新模块想要惰性加载,所以该命令不会在应用的根模块 app.module.ts 中添加对新特性模块的引用。相反,它将声明的路由 customers 添加到以 --module 选项指定的模块中声明的 routes 数组中。
const routes: Routes = [
  {
    path: 'customers',
    loadChildren: () => import('./customers/customers.module').then(m => m.CustomersModule)
  }
];
注意,惰性加载语法使用 loadChildren,其后是一个使用浏览器内置的 import('...') 语法进行动态导入的函数。其导入路径是到当前模块的相对路径。
基于字符串的惰性加载
在 Angular 版本 8 中,loadChildren 路由规范的字符串语法已弃用,建议改用 import() 语法。不过,你仍然可以通过在 tsconfig文件中包含惰性加载的路由来选择使用基于字符串的惰性加载(loadChildren: './path/to/module#Module'),这样它就会在编译时包含惰性加载的文件。
默认情况下,会用 CLI 生成项目,这些项目将更严格地包含旨在与 import() 语法一起使用的文件。
添加另一个特性模块
使用同样的命令创建第二个带路由的惰性加载特性模块及其桩组件。
ng generate module orders --route orders --module app.module这将创建一个名为 orders 的新文件夹,其中包含 OrdersModule 和 OrdersRoutingModule 以及新的 OrdersComponent 源文件。使用 --route 选项指定的 orders 路由,用惰性加载语法添加到了 app-routing.module.ts 文件内的 routes 数组中。
const routes: Routes = [
  {
    path: 'customers',
    loadChildren: () => import('./customers/customers.module').then(m => m.CustomersModule)
  },
  {
    path: 'orders',
    loadChildren: () => import('./orders/orders.module').then(m => m.OrdersModule)
  }
];
建立 UI
虽然你也可以在地址栏中输入 URL,不过导航 UI 会更好用,也更常见。把 app.component.html 中的占位脚本替换成一个自定义的导航,以便你在浏览器中能在模块之间导航。
<h1>
  {{title}}
</h1>

<button type="button" routerLink="/customers">Customers</button>
<button type="button" routerLink="/orders">Orders</button>
<button type="button" routerLink="">Home</button>

<router-outlet></router-outlet>
要想在浏览器中看到你的应用,就在终端窗口中输入下列命令:
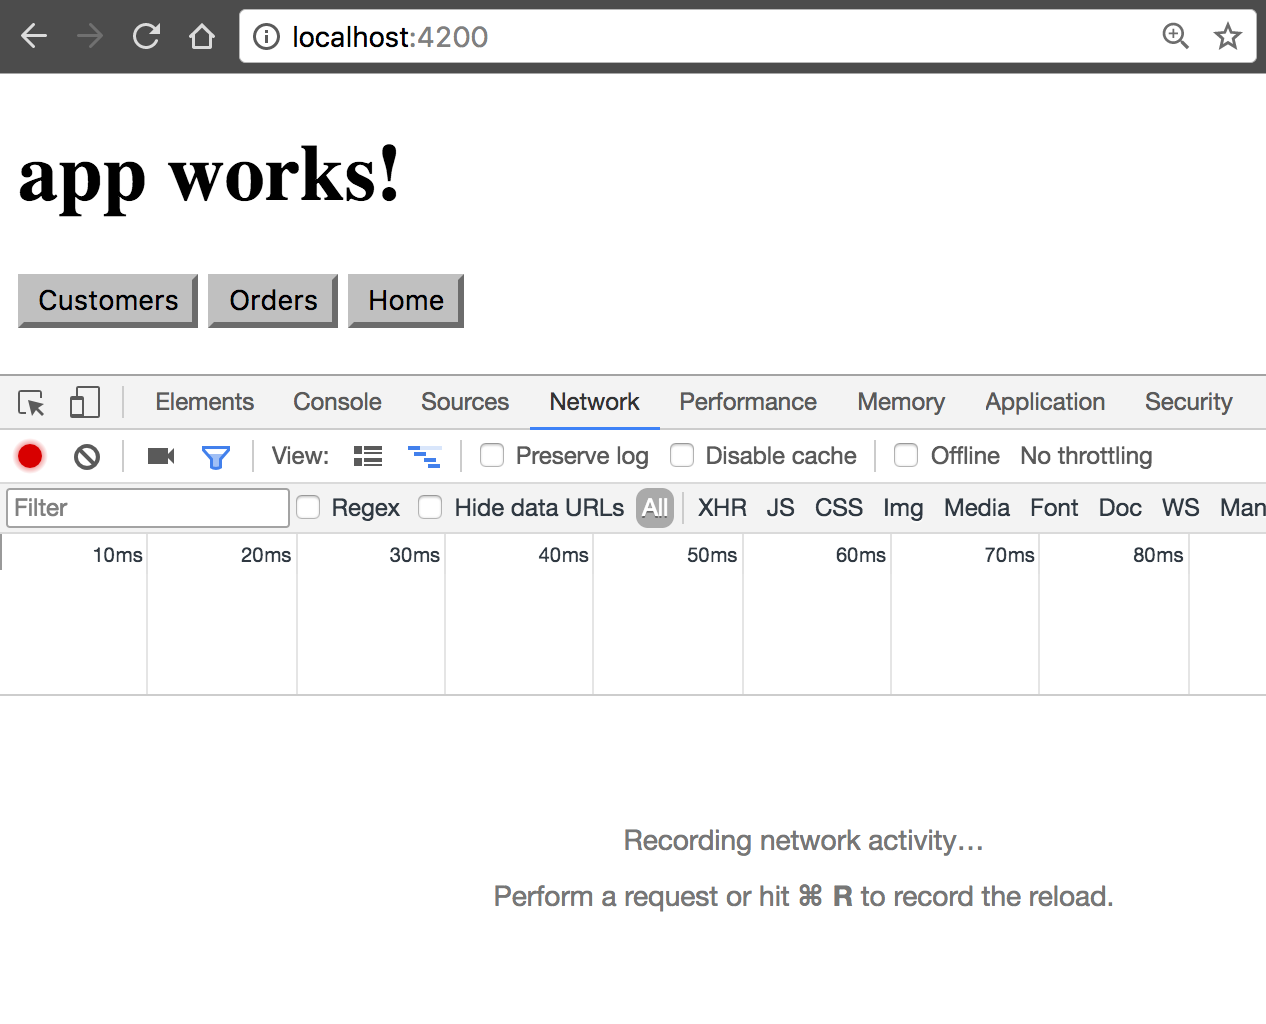
ng serve然后,跳转到 localhost:4200,这时你应该看到 "customer-app" 和三个按钮。

这些按钮生效了,因为 CLI 会自动将特性模块的路由添加到 app-routing.module.ts 中的 routes 数组中。
导入与路由配置
CLI 会将每个特性模块自动添加到应用级的路由映射表中。通过添加默认路由来最终完成这些步骤。在 app-routing.module.ts 文件中,使用如下命令更新 routes 数组:
const routes: Routes = [
  {
    path: 'customers',
    loadChildren: () => import('./customers/customers.module').then(m => m.CustomersModule)
  },
  {
    path: 'orders',
    loadChildren: () => import('./orders/orders.module').then(m => m.OrdersModule)
  },
  {
    path: '',
    redirectTo: '',
    pathMatch: 'full'
  }
];
前两个路径是到 CustomersModule 和 OrdersModule 的路由。最后一个条目则定义了默认路由。空路径匹配所有不匹配先前路径的内容。
特性模块内部
接下来,仔细看看 customers.module.ts 文件。如果你使用的是 CLI,并按照此页面中的步骤进行操作,则无需在此处执行任何操作。
import { NgModule } from '@angular/core';
import { CommonModule } from '@angular/common';
import { CustomersRoutingModule } from './customers-routing.module';
import { CustomersComponent } from './customers.component';

@NgModule({
  imports: [
    CommonModule,
    CustomersRoutingModule
  ],
  declarations: [CustomersComponent]
})
export class CustomersModule { }customers.module.ts 文件导入了 customers-routing.module.ts 和 customers.component.ts 文件。@NgModule 的 imports 数组中列出了 CustomersRoutingModule,让 CustomersModule 可以访问它自己的路由模块。CustomersComponent 位于 declarations 数组中,这意味着 CustomersComponent 属于 CustomersModule。
然后,app-routing.module.ts 会使用 JavaScript 的动态导入功能来导入特性模块 customers.module.ts。
专属于特性模块的路由定义文件 customers-routing.module.ts 将导入在 customers.component.ts 文件中定义的自有特性组件,以及其它 JavaScript 导入语句。然后将空路径映射到 CustomersComponent。
import { NgModule } from '@angular/core';
import { Routes, RouterModule } from '@angular/router';

import { CustomersComponent } from './customers.component';


const routes: Routes = [
  {
    path: '',
    component: CustomersComponent
  }
];

@NgModule({
  imports: [RouterModule.forChild(routes)],
  exports: [RouterModule]
})
export class CustomersRoutingModule { }
这里的 path 设置为空字符串,因为 AppRoutingModule 中的路径已经设置为 customers,因此,CustomersRoutingModule 中的此路由已经位于 customers 这个上下文中。此路由模块中的每个路由都是其子路由。
另一个特性模块中路由模块的配置也类似。
import { OrdersComponent } from './orders.component';

const routes: Routes = [
  {
    path: '',
    component: OrdersComponent
  }
];
确认它工作正常
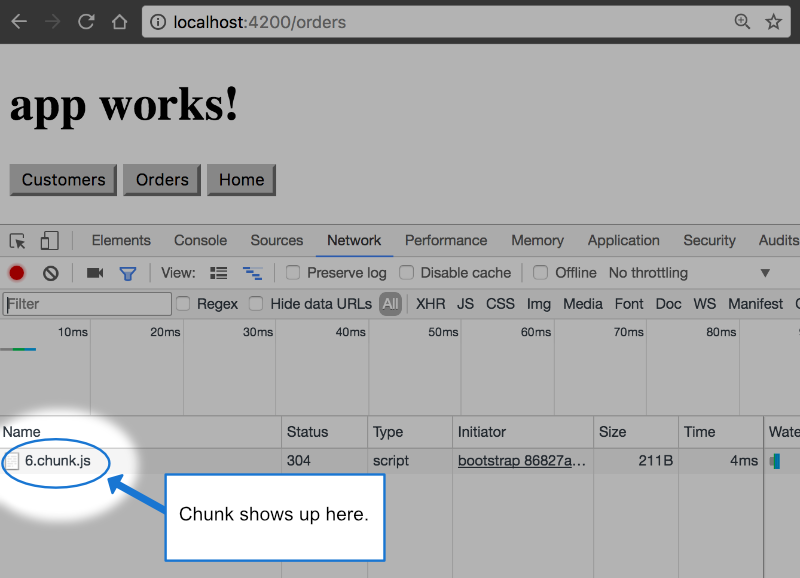
你可以使用 Chrome 开发者工具来确认一下这些模块真的是惰性加载的。在 Chrome 中,按 Cmd+Option+i(Mac)或 Ctrl+Shift+j(PC),并选中 Network 页标签。

点击 Orders 或 Customers 按钮。如果你看到某个 chunk 文件出现了,就表示一切就绪,特性模块被惰性加载成功了。Orders 和 Customers 都应该出现一次 chunk,并且它们各自只应该出现一次。

要想再次查看它或测试本项目后面的行为,只要点击 Network 页左上放的 清除 图标即可。

然后,使用 Cmd+r(Mac)或 Ctrl+r(PC)重新加载页面。
forRoot() 与 forChild()
你可能已经注意到了,CLI 会把 RouterModule.forRoot(routes) 添加到 AppRoutingModule 的 imports 数组中。这会让 Angular 知道 AppRoutingModule 是一个路由模块,而 forRoot() 表示这是一个根路由模块。它会配置你传入的所有路由、让你能访问路由器指令并注册 Router。forRoot() 在应用中只应该使用一次,也就是这个 AppRoutingModule 中。
CLI 还会把 RouterModule.forChild(routes) 添加到各个特性模块中。这种方式下 Angular 就会知道这个路由列表只负责提供额外的路由并且其设计意图是作为特性模块使用。你可以在多个模块中使用 forChild()。
forRoot() 方法为路由器管理全局性的注入器配置。forChild() 方法中没有注入器配置,只有像 RouterOutlet 和 RouterLink 这样的指令。
预加载
预加载通过在后台加载部分应用来改进用户体验。你可以预加载模块或组件数据。
预加载模块
预加载模块通过在后台加载部分应用来改善用户体验,这样用户在激活路由时就无需等待下载这些元素。
要启用所有惰性加载模块的预加载,请从 Angular 的 router 导入 PreloadAllModules 令牌。
import { PreloadAllModules } from '@angular/router';还是在 AppRoutingModule 中,通过 forRoot() 指定你的预加载策略。
RouterModule.forRoot(
  appRoutes,
  {
    preloadingStrategy: PreloadAllModules
  }
)
预加载组件数据
要预加载组件数据,可以用 resolver 守卫。解析器通过阻止页面加载来改进用户体验,直到显示页面时的全部必要数据都可用。
解析器
创建一个解析器服务。通过 CLI,生成服务的命令如下:
ng generate service <service-name>在新创建的服务中,实现由 @angular/router 包提供的 Resolve 接口:
import { Resolve } from '@angular/router';

…

/* An interface that represents your data model */
export interface Crisis {
  id: number;
  name: string;
}

export class CrisisDetailResolverService implements Resolve<Crisis> {
  resolve(route: ActivatedRouteSnapshot, state: RouterStateSnapshot): Observable<Crisis> {
    // your logic goes here
  }
}
把这个解析器导入此模块的路由模块。
import { CrisisDetailResolverService } from './crisis-detail-resolver.service';在组件的 route 配置中添加一个 resolve 对象。
{
  path: '/your-path',
  component: YourComponent,
  resolve: {
    crisis: CrisisDetailResolverService
  }
}
在此组件的构造函数中,注入一个 ActivatedRoute 实例,它可以表示当前路由。
import { ActivatedRoute } from '@angular/router';

@Component({ … })
class YourComponent {
  constructor(private route: ActivatedRoute) {}
}
使用注入进来的 ActivatedRoute 类实例来访问与指定路由关联的 data 值。
import { ActivatedRoute } from '@angular/router';

@Component({ … })
class YourComponent {
  constructor(private route: ActivatedRoute) {}

  ngOnInit() {
    this.route.data
      .subscribe(data => {
        const crisis: Crisis = data.crisis;
        // …
      });
  }
}
对惰性加载模块进行故障排除
惰性加载模块时常见的错误之一,就是在应用程序中的多个位置导入通用模块。可以先用 Angular CLI 生成模块并包括 --route route-name 参数,来测试这种情况,其中 route-name 是模块的名称。接下来,生成不带 --route 参数的模块。如果你用了 --route 参数,Angular CLI 就会生成错误,但如果不使用它便可以正确运行,则可能是在多个位置导入了相同的模块。
请记住,许多常见的 Angular 模块都应该导入应用的基础模块中。