OnGUI Button 控件
在 Unity 3D 开发中 Button 控件是游戏开发中最常使用的控件之一,用户常常通过 Button 控件来确定其选择行为,当用户单击 Button 控件时,Button 控件会显示按下的效果,并触发与该控件关联的游戏功能。
在游戏中通常用作游戏界面、游戏功能、游戏设置的开关。
一般来说,按钮分两种:
- 普通按钮。
- 图片按钮。
普通按钮
普通按钮是系统默认显示的按钮,Unity 3D 的普通按钮背景呈半透明状态,显示白色文字。
普通按钮的使用方法如下:
public static function Button(position:Rect, text:string):bool;
public static function Button(position:Rect, image:Texture):bool;
public static function Button(position:Rect, content:GUIContent):bool;
public static function Button(position:Rect, text:string, style:GUIStyle):bool;
public static function Button(position:Rect, image:Texture, style:GUIStyle):bool;
public static function Button(position:Rect, content:GUIContent, style:GUIStyle):bool;
注:
position指按钮在屏幕上的位置以及长宽值。
text指按钮上显示的文本。
Button 控件的参数如下表所示。
| 参数 | 描述 |
|---|---|
position |
设置控件在屏幕上的位置及大小。 |
image |
设置控件上显示的纹理图片。 |
style |
设置控件使用的样式。 |
text |
设置控件上显示的文本。 |
content |
设置控件的文本、图片和提示。 |
使用案例
- 启动 Unity 3D 创建新项目。

- 执行
File→Save Scene命令,并保存场景。

- 创建 JavaScript 脚本。

- 打开脚本编辑器,输入脚本语句,然后保存。

    function OnGUI(){
        if(GUI.Button(Rect(0, 0, 100, 50), "click here")){
            print("you have click here!");
        }
}- 将脚本与主摄像机相连。
将脚本拖到 Hierarchy 视图中的 Main Camera 对象中产生关联。
- 测试脚本。
单击 Unity 3D 工具栏上的运行按钮对脚本进行测试,如下图所示,在 Game 视图中出现了一个按钮,按钮上显示 "click here",单击该按钮,在 Unity 3D 主界面底部的状态栏上输出 "You have click here"。

图片按钮
Button 控件除了可以显示文字以外,还可以显示贴图。
贴图是一种美化按钮的方法,开发者可以设定按钮的背景图片,比如水晶按钮、卡通按钮等。
在 Unity 3D 中实现 Button 贴图十分容易,只要将图片作为一个参数传递到 Button 函数中即可。
Button 贴图方法如下:
public static function Button(position:Rect, image:Texture):bool;
public static function Button(position:Rect, image:Texture, style:GUIStyle):bool;
其中 Position 定义了按钮在屏幕上的位置及长宽值,image 为按钮上显示的图片。
使用案例
- 启动 Unity 3D 创建新项目,将其命名为
Button。
- 在菜单中执行
File→Save Scene命令,保存当前场景,命名为scene,即在 Unity 3D 中创建了一个游戏场景。
- 单击 Project 视图中
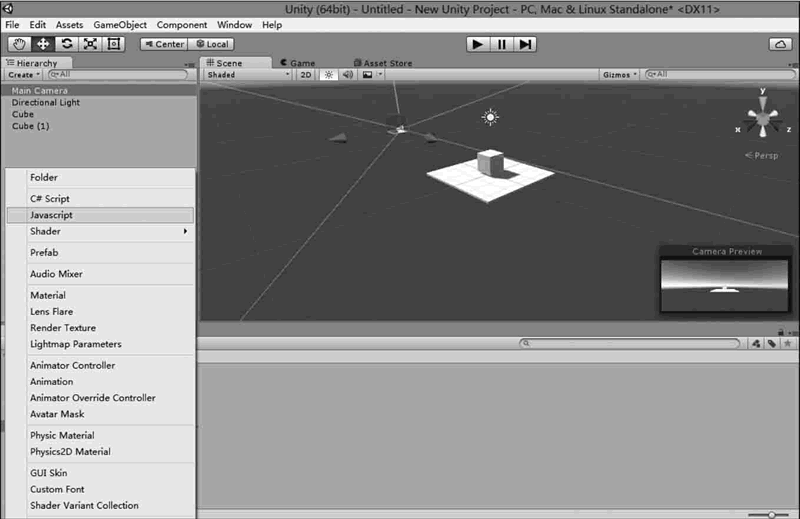
create右侧的下拉三角形,选择 JavaScript ,创建 JavaScript 脚本。
- 在 Project 视图中双击该脚本文件,打开脚本编辑器,输入下列脚本语句:
    var btnTexture:Texture;
    var atnTexture:Texture;
    function OnGUI(){
        if(!btnTexture){
            Debug.LogError("Please assign a texture on the inspector");
            return;
        }
        if(!atnTexture){
            Debug.LogError("Please assign a texture on the inspector");
            return;
        }
        if(GUI.Button(Rect(Screen.width/2-50, Screen.height/2+130, 70, 70),atnTexture)){
            Application.LoadLevel("play");
        }
        if(GUI.Button(Rect(Screen.width/2+30, Screen.height/2+130, 70, 70),btnTexture)){
            Application.LoadLevel("exit");
        }
}- 保存脚本(Ctrl+S 键)。
- 将脚本与主摄像机相连。
- 单击主摄像机,在
Inspector属性面板中添加纹理图片。
- 单击
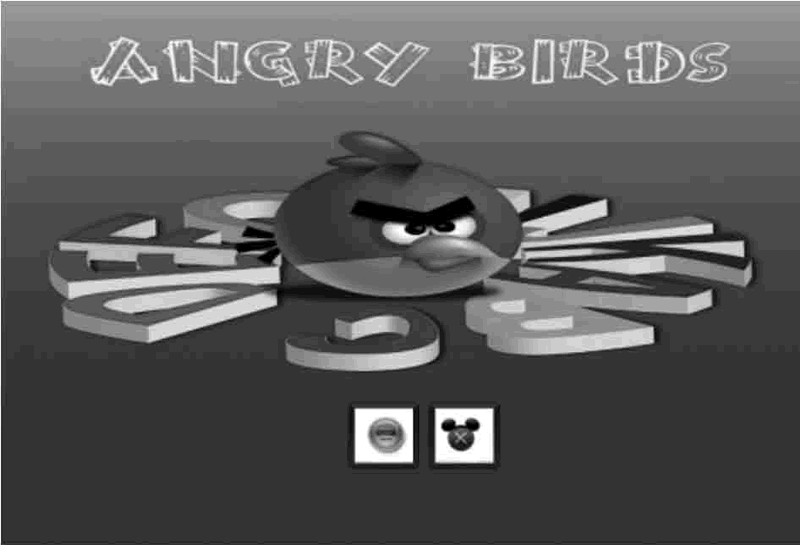
play按钮测试效果,可以看见按钮已经换成了二维卡通图片的形式,如下图所示。
