弹簧曲线动画
ArkUI提供了预置动画曲线,指定了动画属性从起始值到终止值的变化规律,如Linear、Ease、EaseIn等。同时,ArkUI也提供了由弹簧振子物理模型产生的弹簧曲线。通过弹簧曲线,开发者可以设置超过设置的终止值,在终止值附近震荡,直至最终停下来的效果。弹簧曲线的动画效果比其他曲线具有更强的互动性、可玩性。
弹簧曲线的接口包括两类,一类是springCurve,另一类是springMotion和responsiveSpringMotion,这两种方式都可以产生弹簧曲线。
使用springCurve
springCurve的接口为:
- springCurve(velocity: number, mass: number, stiffness: number, damping: number)
构造参数包括初速度,弹簧系统的质量、刚度、阻尼。构建springCurve时,可指定质量为1,根据springCurve中的参数说明,调节刚度、阻尼两个参数,达到想要的震荡效果。
- import curves from '@ohos.curves';
- @Entry
- @Component
- struct SpringTest {
- @State translateX: number = 0;
- private jumpWithSpeed(speed: number) {
- this.translateX = -1;
- animateTo({ duration: 2000, curve: curves.springCurve(speed, 1, 1, 1.2) }, () => {
- // 以指定初速度进行x方向的平移的弹簧动画
- this.translateX = 0;
- })
- }
- build() {
- Column() {
- Button("button")
- .fontSize(14)
- .width(100)
- .height(50)
- .margin(30)
- .translate({ x: this.translateX })
- Row({space:50}) {
- Button("jump 50").fontSize(14)
- .onClick(() => {
- // 以初速度50的弹簧曲线进行平移
- this.jumpWithSpeed(50);
- })
- Button("jump 200").fontSize(14)
- .onClick(() => {
- // 以初速度200的弹簧曲线进行平移
- this.jumpWithSpeed(200);
- })
- }.margin(30)
- }.height('100%').width('100%')
- }
- }

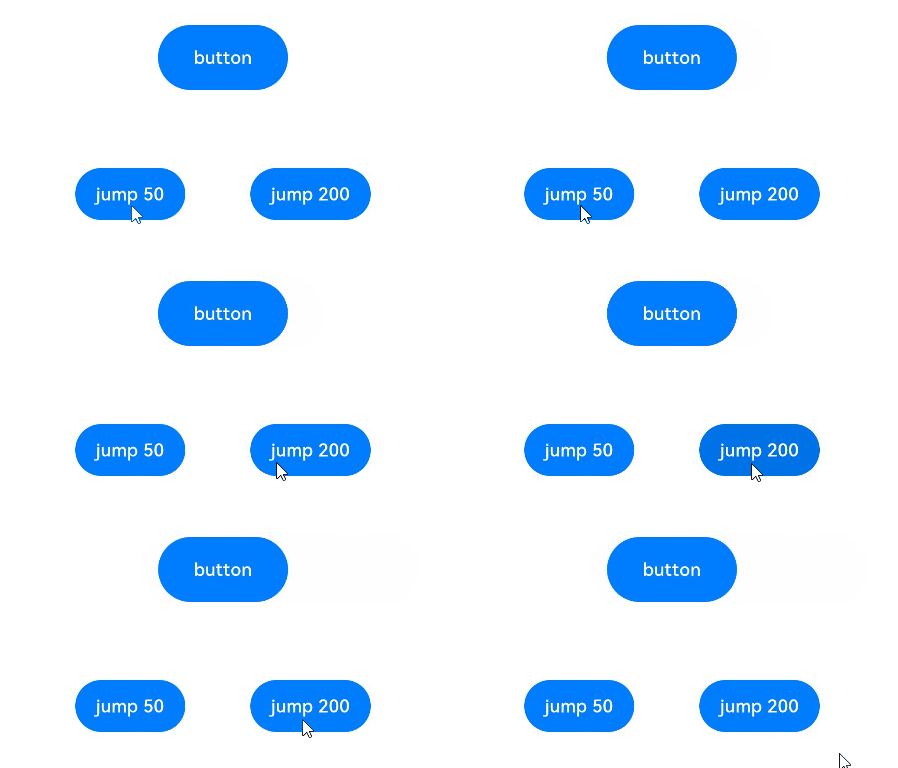
以上示例中,点击不同的按钮,给定springCurve的不同初速度,button会有“弹性”的到达指定位置,且button的振幅随着速度的增大而变大。另外也可以修改springCurve的质量、刚度、阻尼参数,达到想要的弹性的程度。
速度只是放大了振荡的效果,但系统能否产生振荡的效果,取决于弹簧振子本身的物理参数,即质量、刚度、阻尼三个参数。刚度越小、阻尼越大,springCurve的“弹性”越弱,振荡效果越弱。随着刚度减小或阻尼变大,达到过阻尼状态后,无论速度为多大,都不会有在终点值附近振荡的效果。
使用springMotion和responsiveSpringMotion
springMotion的接口为:
- springMotion(response?: number, dampingFraction?: number, overlapDuration?: number)
- responsiveSpringMotion(response?: number, dampingFraction?: number, overlapDuration?: number)
它们的构造参数包括弹簧自然振动周期、阻尼系数、弹性动画衔接时长这三个可选参数,参数的含义请参考其文档。
使用springMotion和responsiveSpringMotion曲线时,duration不生效,适合于跟手动画。
- import curves from '@ohos.curves';
- @Entry
- @Component
- struct SpringMotionTest {
- @State positionX: number = 100;
- @State positionY: number = 100;
- diameter: number = 50;
- build() {
- Column() {
- Row() {
- Circle({ width: this.diameter, height: this.diameter })
- .fill(Color.Blue)
- .position({ x: this.positionX, y: this.positionY })
- .onTouch((event: TouchEvent) => {
- if (event.type === TouchType.Move) {
- // 跟手过程,使用responsiveSpringMotion曲线
- animateTo({ curve: curves.responsiveSpringMotion() }, () => {
- // 减去半径,以使球的中心运动到手指位置
- this.positionX = event.touches[0].screenX - this.diameter / 2;
- this.positionY = event.touches[0].screenY - this.diameter / 2;
- console.info(`move, animateTo x:${this.positionX}, y:${this.positionY}`);
- })
- } else if (event.type === TouchType.Up) {
- // 离手时,使用springMotion曲线
- animateTo({ curve: curves.springMotion() }, () => {
- this.positionX = 100;
- this.positionY = 100;
- console.info(`touchUp, animateTo x:100, y:100`);
- })
- }
- })
- }
- .width("100%").height("80%")
- .clip(true) // 如果球超出父组件范围,使球不可见
- .backgroundColor(Color.Orange)
- Flex({ direction: FlexDirection.Row, alignItems: ItemAlign.Start, justifyContent: FlexAlign.Center }) {
- Text("拖动小球").fontSize(16)
- }
- .width("100%")
- Row() {
- Text('点击位置: [x: ' + Math.round(this.positionX) + ', y:' + Math.round(this.positionY) + ']').fontSize(16)
- }
- .padding(10)
- .width("100%")
- }.height('100%').width('100%')
- }
- }
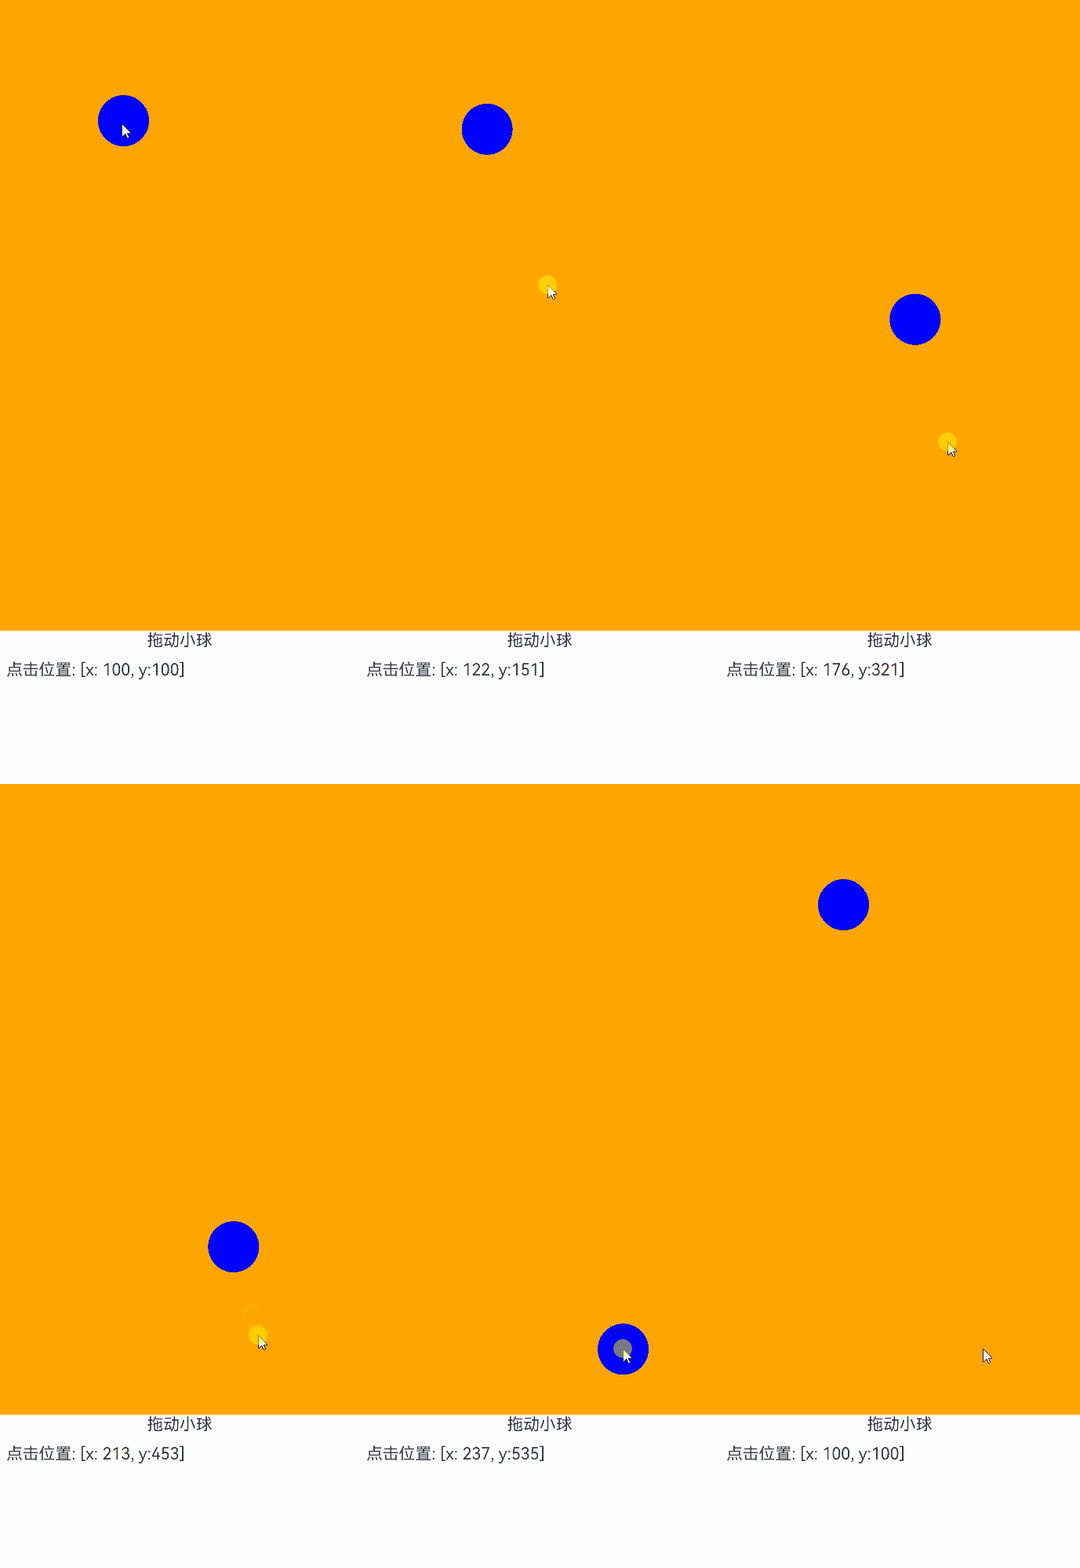
以上代码是跟手动画的一个示例。通过在onTouch事件中,捕捉触摸的位置,改变组件的translate或者position属性,使其在跟手过程中运动到触摸位置,松手后回到原位置。跟手动画的效果如下:

跟手过程推荐使用responsiveSpringMotion曲线,松手过程推荐使用springMotion曲线。跟手过程随着手的位置变化会被多次触发,所以会接连启动多次responsiveSpringMotion动画,松手时启动一次springMotion动画。跟手、松手过程在对同一对象的同一属性上执行动画,且使用了springMotion或responsiveSpringMotion曲线,每次新启动的动画会继承上次动画使用的速度,实现平滑过渡。
1. springCurve可以设置初速度,单一属性存在多个动画时不会互相影响,观察到的是多个动画效果的叠加。
2. springMotion虽然内部有速度机制,但不可由开发者设置。在单一属性存在多个动画时,后一动画会取代前一动画,并继承前一动画的速度。