
GitHub 错误:权限被拒绝(公钥)
权限被拒绝”错误表示服务器拒绝了您的连接。 可能有多个原因,最常见的如下所述。
对 Git 是否应该使用 sudo 命令?
不应对 Git 使用 sudo 命令。 如果有很好的原因必须使用 sudo,请确保对每个命令使用它(可能使用 su 获取 shell 作为该点的根更好)。 如果生成 SSH 密钥而不使用 sudo,则尝试使用 sudo git push 而不使用生成的相同密钥。
检查是否连接到正确的服务器
我们知道,键入 Url 很麻烦。 请注意您键入的内容;您无法连接到 "githib.com" 或 "guthub.com"。 有某些情况下,公司网络可能导致解析 DNS 记录有问题。
为确保连接到正确的域,可以输入以下命令:
$ ssh -vT git@github.com
> OpenSSH_5.6p1, OpenSSL 0.9.8r 8 Feb 2011
> debug1: Reading configuration data /Users/you/.ssh/config
> debug1: Reading configuration data /etc/ssh_config
> debug1: Applying options for *
> debug1: Connecting to github.com [IP ADDRESS] port 22.
应连接端口 22,除非覆盖设置以使用通过 HTTPS 的 SSH。
始终使用 "git" 用户
所有连接(包括远程 URL 的连接)必须以 "git" 用户进行。 如果尝试以 GitHub 用户名连接,将会失败:
$ ssh -T GITHUB-USERNAME@github.com
> Permission denied (publickey).
如果连接失败且您通过 GitHub 用户名使用远程 URL,可以更改远程 URL 以使用 "git" 用户。
应键入以下命令来验证连接:
$ ssh -T git@github.com
> Hi username! You've successfully authenticated...
确保您有使用的密钥
如果已安装 GitHub Desktop,可使用它克隆仓库,而无需处理 SSH 密钥。
- 如果您在使用 Git Bash,请启动 ssh-agent:
   # start the ssh-agent in the background
   $ eval "$(ssh-agent -s)"
> Agent pid 59566如果您在使用其他终端提示符,例如 Git for Windows,请启动 ssh-agent:
   # 在后台启动 ssh-agent
   $ eval $(ssh-agent -s)
> Agent pid 59566- 确认您的私钥已生成并加载到 SSH。 如果使用的是 OpenSSH 6.7 或更早版本:
   $ ssh-add -l
   > 2048 a0:dd:42:3c:5a:9d:e4:2a:21:52:4e:78:07:6e:c8:4d /Users/you/.ssh/id_rsa (RSA)
如果使用的是 OpenSSH 6.8 或更新版本:
   $ ssh-add -l -E md5
   > 2048 MD5:a0:dd:42:3c:5a:9d:e4:2a:21:52:4e:78:07:6e:c8:4d /Users/you/.ssh/id_rsa (RSA)
ssh-add 命令应印出一个长的数字和字母字符串。 如果未印出任何内容,则需要生成新 SSH 密钥并将其与 GitHub 关联。
提示:在大多数系统中,默认私钥 (
~/.ssh/id_rsa和~/.ssh/identity) 会自动添加到 SSH 身体验证代理中。 应无需运行ssh-add path/to/key,除非在生成密钥时覆盖文件名。
获取更多详细信息
也可尝试连接 git@github.com 来检查使用的密钥:
$ ssh -vT git@github.com
> ...
> debug1: identity file /Users/you/.ssh/id_rsa type -1
> debug1: identity file /Users/you/.ssh/id_rsa-cert type -1
> debug1: identity file /Users/you/.ssh/id_dsa type -1
> debug1: identity file /Users/you/.ssh/id_dsa-cert type -1
> ...
> debug1: Authentications that can continue: publickey
> debug1: Next authentication method: publickey
> debug1: Trying private key: /Users/you/.ssh/id_rsa
> debug1: Trying private key: /Users/you/.ssh/id_dsa
> debug1: No more authentication methods to try.
> Permission denied (publickey).
在该示例中,我们没有任何密钥供 SSH 使用。 "identity file" 行末的 "-1" 表示 SSH 找不到可使用的文件。 后面的 "Trying private key" 行也表示未找到文件。 如果文件存在,这些行将分别是 "1" 和 "Offering public key":
$ ssh -vT git@github.com
> ...
> debug1: identity file /Users/you/.ssh/id_rsa type 1
> ...
> debug1: Authentications that can continue: publickey
> debug1: Next authentication method: publickey
> debug1: Offering RSA public key: /Users/you/.ssh/id_rsa
确认公钥已附加到您的帐户
必须向 GitHub 提供公钥才可建立安全连接。
- 打开命令行。
- 在后台启动 SSH 代理程序。
   $ ssh-agent -s
> Agent pid 59566- 找到并记录公钥指纹。 如果使用的是 OpenSSH 6.7 或更早版本:
   $ ssh-add -l
   > 2048 a0:dd:42:3c:5a:9d:e4:2a:21:52:4e:78:07:6e:c8:4d /Users/USERNAME/.ssh/id_rsa (RSA)
如果使用的是 OpenSSH 6.8 或更新版本:
   $ ssh-add -l -E md5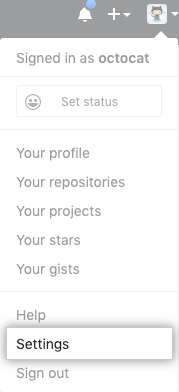
> 2048 MD5:a0:dd:42:3c:5a:9d:e4:2a:21:52:4e:78:07:6e:c8:4d /Users/USERNAME/.ssh/id_rsa (RSA)- 在任何页面的右上角,单击您的个人资料照片,然后单击 Settings(设置)。
- 在用户设置侧边栏中,单击 SSH and GPG keys(SSH 和 GPG 密钥)。

- 比较 SSH 公钥列表与
ssh-add命令的输出。

如果在 GitHub 中未看到公钥,则需要添加 SSH 密钥到 GitHub 并将其与您的计算机关联。
警告:如果在 GitHub 上看到您不熟悉的 SSH 密钥,请立即删除并联系 GitHub 支持 或 GitHub 高级支持 寻求进一步的帮助。 无法识别的公钥可能表示安全问题。 更多信息请参阅“审查 SSH 密钥”。